Start from scratch, learn the Newsletter plug-in and email settings for opening a shop on shopify in 30 days—Day27
Start from scratch, learn the Newsletter plug-in and email settings for opening a shop on shopify in 30 days—Day27
Free 14 days Shopify shop application,
https://www.shopify.com/?ref=laoqu
Today I want to talk about a Newsletter plugin.

Several lists have been created here: Newsletter, customer list, CA abandonment list, etc.:

If you haven’t connected Shopify yet, click Integrations–>Shopify setup–>connect shop:

Under normal circumstances, the Newsletter section will appear at the bottom of the website. As long as the user submits the email and registers, it will appear in our Newsletter list.

Sendlane can also send emails to customers who have abandoned their purchases.
Suppose someone buys something in our shop, fills in the contact information and arrives at the page for choosing the shipping method, and then closes the page, then such customers will be added to our CA abandonment list.
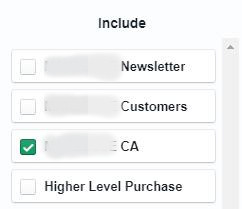
In the basic section of Integration–>ShopIfy setup–>manage, we can add the created Newsletter list, customer list, and abandoned purchase list respectively:

As for the Advanced part, let’s take a brief look.
Click create new segment, you can create it according to label, product collection or product type. For example, according to the label creation, the label name is equal to dogs, and the action can choose to buy or abandon the purchase. For example, we choose to buy and add the customer to the customer list. In other words, if someone buys a product with a dogs tag, then this customer will be added to our customer list.

We can create automatic sending emails in Automations.
Click Automation-->add automation-->start from scratch-->workflow:

Selection list, for example, we choose abandonment list. Any users who abandon the purchase will receive the email series we will create next.


Enter the name of Automation:

Now enter the workflow, click the + sign, add wait, the time can be set to 2 hours.

Click Save, and then click the + sign to add emails:

Choose to create a message:

In fact, there are also purchase recovery emails that can be set in Shopify's checkout.
Log in to Shopify, click settings–>checkout. You can check the automatic send abandonment recovery email.

You can choose a mail sending time from 4 time options. Click Customize email, you can modify the subject of the email, and finally save it. Click Preview to preview the email.

But now with the Sendlane plug-in, we can make emails more beautiful and can send a series of emails.
Go back to the previous section of creating an email, enter the name and subject of the email:

Then select the email template, you can choose the preset template, there are many beautiful templates to choose from, but it should be noted that if you use the preset template to set up the email, your email is likely to enter the customer gmail promotion Block or trash can.
We can click start from scratch to set up the email from scratch:

Enter the content of the email and add a hyperlink to some of the content. This hyperlink is the link to your shopping cart: https://www.abc.com/cart. After selecting the text, click the hyperlink icon to add a link.

(Because the browser has cookie tracking, if the user clicks on the shopping cart link in the previous browser, the page of their shopping cart will be opened.)
Like some call to action, in addition to adding a hyperlink, you can also add an underline and bold:

After writing the email, click save and continue in the upper right corner.
After clicking Finish, it is also possible if you want to continue adding other content. For example, click the + sign and add a wait, such as 1 day. 1 day here means 1 day after the last email was sent.

Just follow this method to set up a series of emails to restore the shopping cart.
We have a 10% discount coupon in our email, so we have to return to Shopify to create a discount code the day after tomorrow.
Click discount–>create discount code, and finally save it.

For users who sign up for our newsletter, we can also provide discount codes. Some themes can also add a discount code in the custom footer settings, but not all themes have this feature.

In this way, if the user enters the email address to register, the coupon code will pop up at the top of the page:

The above is today's content.
This article comes from Gu Xiaobei's B2C blog
Comments
Post a Comment